These handmade holiday dachshund ornaments are a sweet and festive nod to everyone's favorite long dog. A step by step guide makes it easy to do yourself!
tutorial originally published December 21, 2010
Handmade Holiday Dachshund Ornaments
In the spirit of learning something new, I signed up for a handmade holiday ornament exchange.
I am SO glad I did. It was SO much fun, and completely pulled me out of my comfort zone and was a fun challenge.
I do not sew.
So, I'd give anyone who reads regularly or knows me, a HALF a guess as to what I would make.
Okay, onto the tutorial.
Gather your tools: Embroidery thread, sharp scissors, a needle, a chopstick.

Gather your material: natural fiber vegan felt and stuffing.

Gather your inspiration: Dachshunds Basil, Jake and Elwood.
Basil dachshund

Jake dachshund

Elwood dachshund
um, Elwood giving me the side eye.

The sweet puppy inspiration is my favorite.
Draw your shape, in this case, a dachshund. make a stencil. Ink an outline onto felt.

Cut out your template. You will use as a guide to cut out all doxies.

You need two pieces of felt for each dachshund.

Fold over a piece of felt, pin down template dachshund, cut.

Cut two ears.

Now you are ready to start sewing! I used the blanket stitch:
Bring the threaded needle from the back of the fabric through to the front at the desired distance from the edge - this determines the width of the stitch. I start from the inside the pieces of felt, so the knot doesn't show.

To sew the first stitch, put the needle into the fabric from the front, the same distance from the edge as the thread came through in Step 1 and to the left. The distance between the two should remain consistent. When pulling needle / thread through, I stick my finger out to catch the loop before I pull all the way through.

Pass the needle through the loop and pull tight.

To sew the second stitch, put the needle through the back, at the same distance as the first, pull needle through to front, catching loop with finger and pass needle through loop. Pull tight. Repeat!
Then do the same stitching on each ear!

I actually stitched the ears first, then when I got to the top of each doxie head, I'd stitch the ears on as I went along... an ear for each side, flappable.

For these dachshund shapes, I began at the left of the belly, by the back leg, and sewed away from the belly all around the dachshund.

I take out the needle, but leave the thread in. After you stuff, you can keep sewing!

Ready to stuff!

Use very small amounts of stuffing at one time...

This is where the chopstick comes in: use the chopstick to push the stuffing evenly into the head and legs.

Poke the stuffing into the leg, the tail if possible (the tail sticks up on its own), the head, front leg.
You need to hold the belly together to finish sewing...

Then sew a nose.

After the nose, stick the needle inside the head, poking out where you want the eye.

Sew an eye, poke through to the other side, sew another eye.

Well, hello dachshund.

Hello, everyone!!

Next, pick another color of felt and cut a scarf.

Wrap around doxie, sew down in the middle, add a button. I used a silver charm on each one.

Using ⅛th inch satin ribbon, sew a hanger loop in the middle of the doxie back.
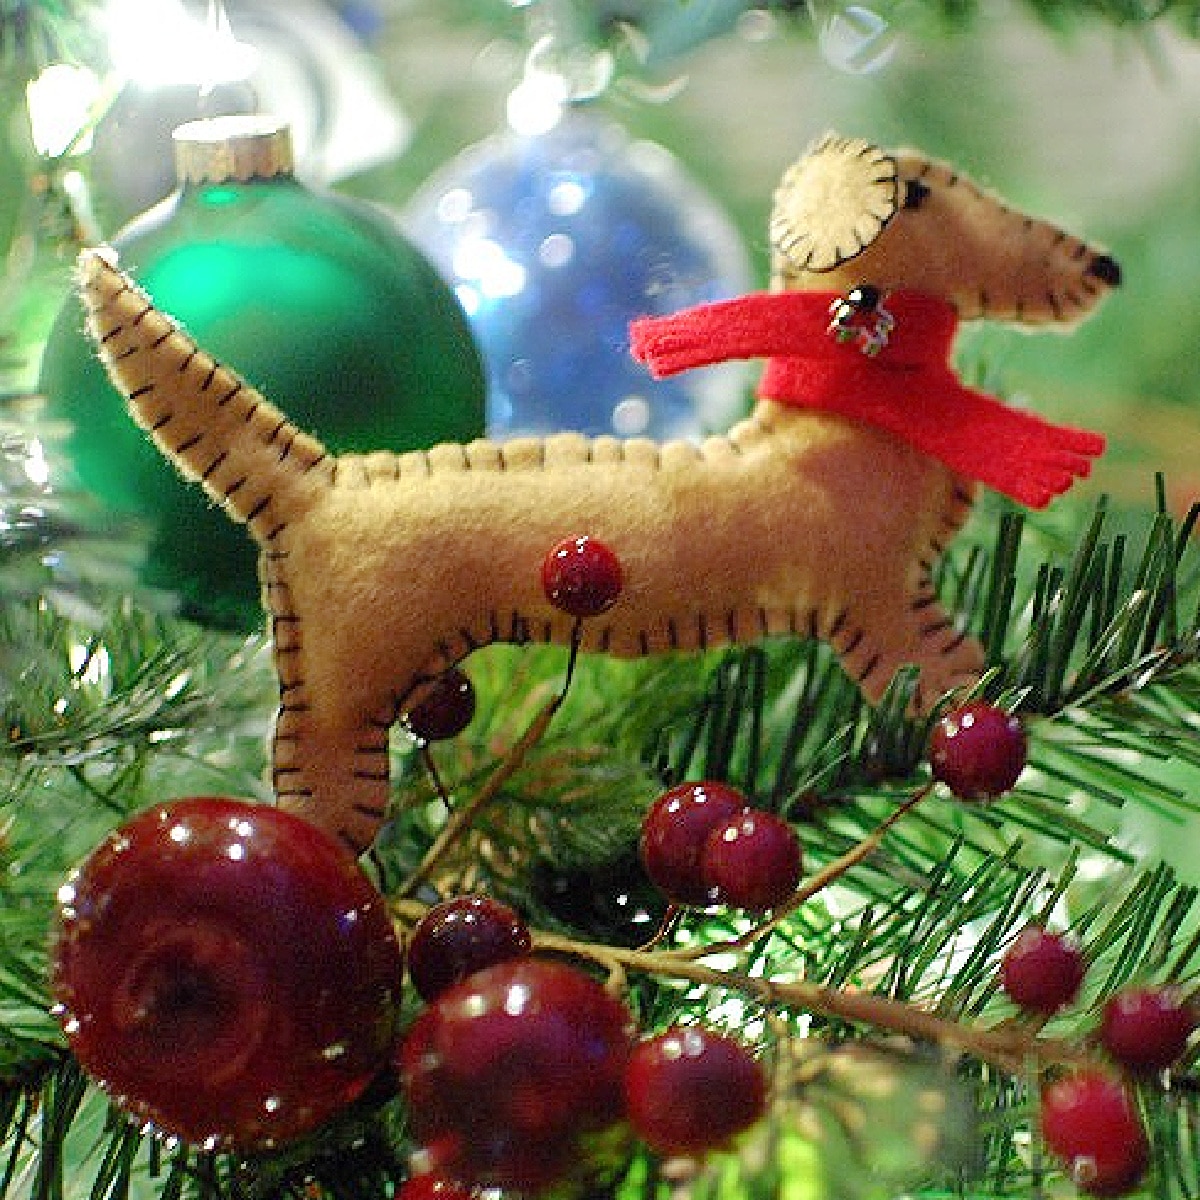
Completed Dachshund!

I made two for each recipient of the ornament exchange. I estimated they took about 2 ¼ hours each, and as I got into a groove, it was under 2 hours per pup.

I also made a few for a couple friends with dachshunds.
This one is custom to match a friend's dog:

I wish I had the time to make them for all the doxies I know!

HAPPY HOLIDAYS !

sharon goldman says
These are so cute! I hope to make some this year for my friend who has 4 Doxie rescues ! ....and if I get even more creative I will make some out of "organic" material in the shape of an Italian Greyhound for my daughter-in-law..your tutorial makes this look easy...I hope I can do it 🙂
Libbie & The Long Dogs says
Hi just stumbled upon your website... Just love the Christmas ornaments. Might just be a few adorning our tree this year! Will send you photos if we manage to get round to it!
The Down Under Long Dogs
Evie, Quincy, Podge & Meah (who is not a Dachshund, but eats like one) and the Slave Libbie
spabettie says
hello Libbie, Evie, Quincy, Podge and Meah!! 🙂 Basil sends *wag wag wags* too. Thanks for stopping by and saying hello, and if you do make the ornaments PLEASE share photos! 😀 they are really fun to make.
I have added you to my dachshund page --> DOXIES 😀 Cheers!
Kath (My Funny Little Life) says
Oh my goodness, I love them! 😀 😀 I want them! 😀 😀 And I can't believe you made so many! 😀 😀
Coco says
Those are awesome! And your "models" are precious!
spabettie says
THANK YOU!! 🙂
christina says
i admire your patience and creativity.
Christina (Dinner at Christina's) says
Ok, so I totally raved about these on Twitter, but didn't leave a comment!! I absolutely freaking LOVE these with all of my heart!! They are so cute and so creative!
I sew some. I used to sew a lot when I was younger - my cousin and I (7 months apart, grew up like sisters) took sewing classes together. I made all my clothes in 7th grade. Now I'm not so confident, though. I sew aprons and sell them on Etsy. Also I sewed felted stockings for me and J. His is a dino claw and mine is a ballet slipper! hehe
spabettie says
Thanks, Christina !! they were pretty fun to make, and I love thinking of them all traveling around the country... 😀 I am going to go look at your Etsy shop now!
Christina (Dinner at Christina's) says
It's http://www.etsy.com/shop/DinneratXtinas
And I totally forgot to add a comment about the "side eye." I love that you captured that and pointed it out. Corky does it too and it CRACKS me up!!!
Amanda says
You are so talented! These look absolutely adorable. You should open an ETSY shop. 🙂
spabettie says
THANKS, Amanda! I am actually thinking about it, for something ELSE. Hmm... 😉
S @ extremebalance.net/blog says
definitely no on the sewing (though I wish I did!), and man---you give Martha a serious run for her money. 🙂
spabettie says
AW ! that's a definite compliment! these little weenies were pretty fun!
Marci says
So cute! You sure make it look easy with the step by step instructions. I almost think I could do it!
spabettie says
Thanks!! and yes - you TOTALLY could !! 😀
veggietestkitchen says
wow, amazing job for someone who doesn't sew. i'm impressed. the only thing i can really sew is a hem. haha.
spabettie says
ha! I can't really even do that... 😉