These handmade holiday dachshund ornaments are a sweet and festive nod to everyone's favorite long dog. A step by step guide makes it easy to do yourself!
tutorial originally published December 21, 2010
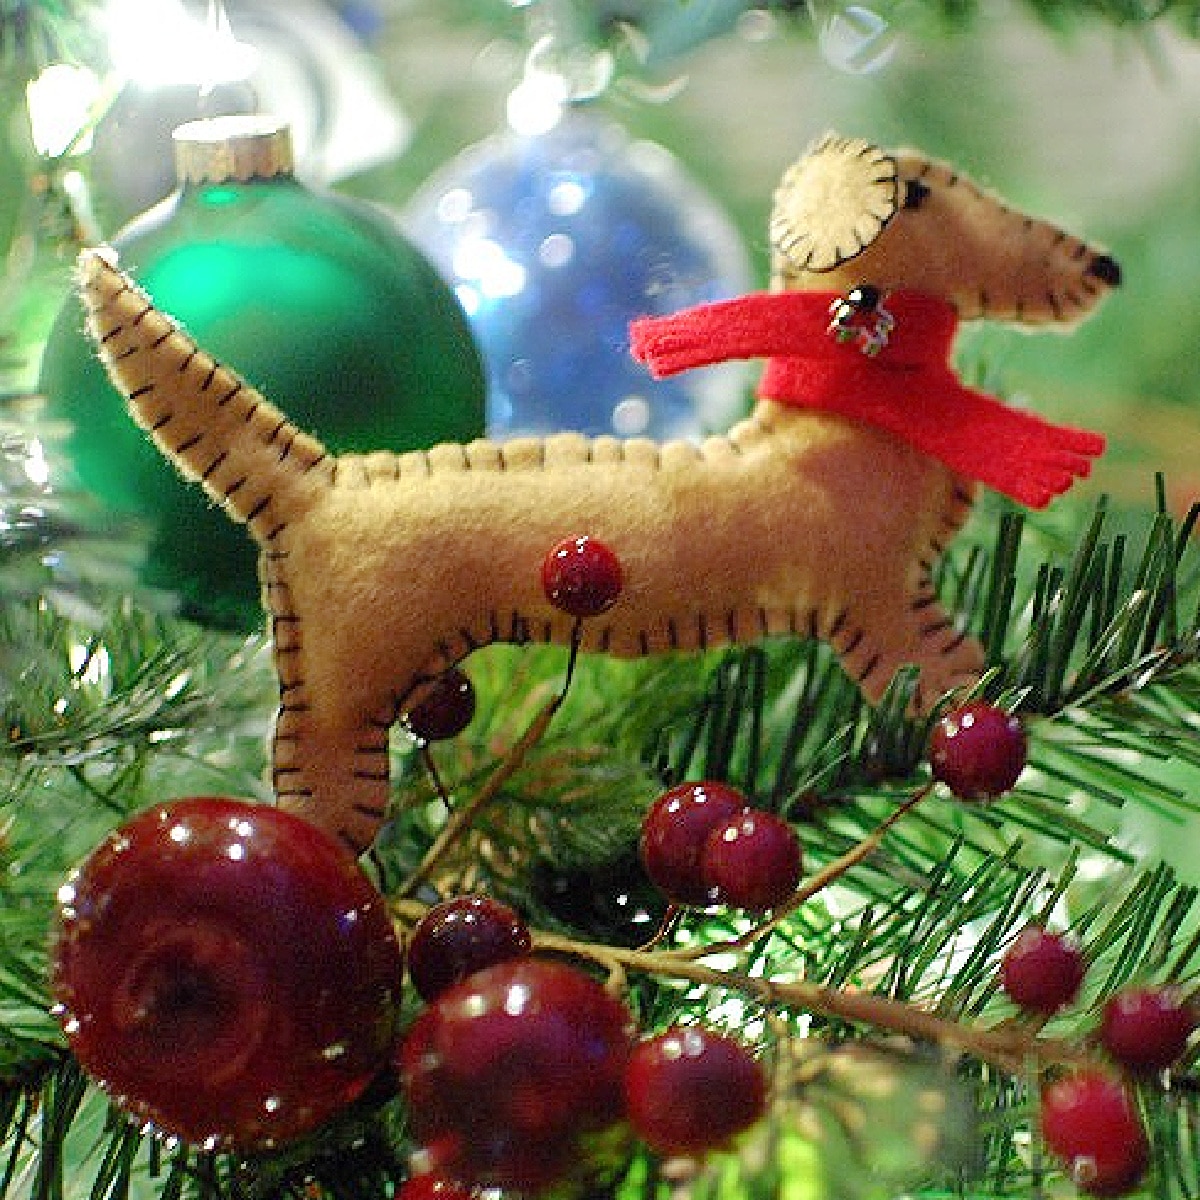
Handmade Holiday Dachshund Ornaments
In the spirit of learning something new, I signed up for a handmade holiday ornament exchange.
I am SO glad I did. It was SO much fun, and completely pulled me out of my comfort zone and was a fun challenge.
I do not sew.
So, I'd give anyone who reads regularly or knows me, a HALF a guess as to what I would make.
Okay, onto the tutorial.
Gather your tools: Embroidery thread, sharp scissors, a needle, a chopstick.

Gather your material: natural fiber vegan felt and stuffing.

Gather your inspiration: Dachshunds Basil, Jake and Elwood.
Basil dachshund

Jake dachshund

Elwood dachshund
um, Elwood giving me the side eye.

The sweet puppy inspiration is my favorite.
Draw your shape, in this case, a dachshund. make a stencil. Ink an outline onto felt.

Cut out your template. You will use as a guide to cut out all doxies.

You need two pieces of felt for each dachshund.

Fold over a piece of felt, pin down template dachshund, cut.

Cut two ears.

Now you are ready to start sewing! I used the blanket stitch:
Bring the threaded needle from the back of the fabric through to the front at the desired distance from the edge - this determines the width of the stitch. I start from the inside the pieces of felt, so the knot doesn't show.

To sew the first stitch, put the needle into the fabric from the front, the same distance from the edge as the thread came through in Step 1 and to the left. The distance between the two should remain consistent. When pulling needle / thread through, I stick my finger out to catch the loop before I pull all the way through.

Pass the needle through the loop and pull tight.

To sew the second stitch, put the needle through the back, at the same distance as the first, pull needle through to front, catching loop with finger and pass needle through loop. Pull tight. Repeat!
Then do the same stitching on each ear!

I actually stitched the ears first, then when I got to the top of each doxie head, I'd stitch the ears on as I went along... an ear for each side, flappable.

For these dachshund shapes, I began at the left of the belly, by the back leg, and sewed away from the belly all around the dachshund.

I take out the needle, but leave the thread in. After you stuff, you can keep sewing!

Ready to stuff!

Use very small amounts of stuffing at one time...

This is where the chopstick comes in: use the chopstick to push the stuffing evenly into the head and legs.

Poke the stuffing into the leg, the tail if possible (the tail sticks up on its own), the head, front leg.
You need to hold the belly together to finish sewing...

Then sew a nose.

After the nose, stick the needle inside the head, poking out where you want the eye.

Sew an eye, poke through to the other side, sew another eye.

Well, hello dachshund.

Hello, everyone!!

Next, pick another color of felt and cut a scarf.

Wrap around doxie, sew down in the middle, add a button. I used a silver charm on each one.

Using ⅛th inch satin ribbon, sew a hanger loop in the middle of the doxie back.
Completed Dachshund!

I made two for each recipient of the ornament exchange. I estimated they took about 2 ¼ hours each, and as I got into a groove, it was under 2 hours per pup.

I also made a few for a couple friends with dachshunds.
This one is custom to match a friend's dog:

I wish I had the time to make them for all the doxies I know!

HAPPY HOLIDAYS !

I Will Run For Chocolate says
Oh my gosh, they are too cute! I saw the ones you sent to Caitlin... adorable!
I don't sew, minus buttons. I tend to ruin things when I try to sew them 🙂
spabettie says
I don't even sew buttons... 😉
Kelly says
These are SO cute!!
Next year you should figure out how to make just as cute pug ones..... 🙂
spabettie says
Thanks, Kelly!! yes, I think PUGS would be just as popular...
Heather (Where's the Beach) says
you go girl! That's great. I do actually sew. I grew up watching my mom sew - she's unfreakingbelievable. Her mother was a seamstress. I don't have a ton of patience though is my downfall. But I've made most of the curtains and pillows in our house.
spabettie says
that's awesome! my mom is a sewer too, she made many of my clothes when I was little - really cool clothes!! 😀
OliePants says
Your dog is adorable! I love the faces! I don't sew but watching you makes me wanna!
spabettie says
aw, thanks... and Basil says thanks! 😀 you should try these, it's fun and pretty easy!
Stacy @ Every Little Thing says
I do not sew but those are adorable and super easy! Love it!
spabettie says
they really are easy!! 😀
Megan @ Sweet On says
This is about to get adapted into a Lab shape! Yay!
spabettie says
AWESOME !! I want to see !!
Liz @ Blog is the New Black says
Little miss creative! I do not sew...
spabettie says
ha! I don't really either !! 😀
lindsay says
thats some serious craftiness! They look adorable!! I will be saving this tutorial. 🙂
LC
spabettie says
thanks, Lindsay! I hope you make some with this, I want to see!!
theTreadmilldiaries says
Wow. You did such an amazing job with the ornaments. They're too cute!
I can manage basic projects with a sewing machine & by hand but nothing too elaborate.
spabettie says
Thank you!! 😀
bitt says
that is so freaking cute!!! great work! i have made some catnip toys in the past but not with as much care because i knew they would be ripped. i'd love to make these.
spabettie says
Thanks!! 🙂 oh, yes, you kinda want to leave the catnip a little sloppy, so they can get into them!!